0
0
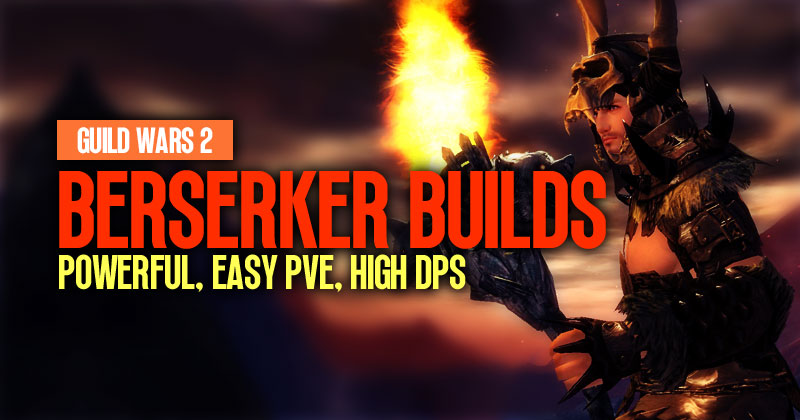
Guild Wars 2 Berserker Builds: Powerful, Easy PVE, High DPS
- Gertie
- Share
- Guild Wars 2
- 06/17/23
- 3577
Welcome to this Guild Wars 2 build! In this guide, we'll be discussing the Power Berserker build, which offers easy and flexible gameplay for various PvE game modes. The goal of this build is to provide you with the ability to switch between different game modes using the same gear with minimal alterations. The Power Berserker build excels in both open world roaming and power DPS. So, let's dive in and explore the pros and cons of the Berserker elite specialization.
- Pros & Cons
- Playstyle & Skills
- Gear & Consumables
- Traits & Specializations
- Adjusting for Survivability
- Rotation Guidance
Builds Links:
↖ Pros & Cons
- + Strong passive healing in the open world due to might stacking.
- + Great support capabilities, including sharing quickness and might with your subgroup.
- + Deals impressive damage and has good burst damage.
- + Engaging rotation without being overwhelming.
- - Constantly racing against the clock with Berserk mode, leaving no breaks.
- - Fully melee build, which may pose challenges in certain encounters.
↖ Playstyle & Skills
Now let's delve into the details of the Power Berserker build. We'll be using dual axes and a longbow as our main weapon sets. Optionally, you can also equip two maces for crowd control or a greatsword for increased damage, although they are not required. Here are the key aspects of the Berserker playstyle:
Burst Skills and Primal Burst:
As a Berserker, you have access to burst skills that become available when you have enough adrenaline. Adrenaline can be found above your weapon skills. In Berserk mode, the burst skills transform into primal burst skills, which can only be used when you have 30 adrenaline. Berserk mode provides increased attack speed and other benefits based on your chosen traits. Activate Berserk mode during skill channels for seamless gameplay. Primal burst skills are your most powerful skills, so use them whenever they are off cooldown.
Sustaining Berserk Mode:
Berserk mode is essential for maximizing damage output. To sustain Berserk mode, you need high-alacrity uptime in group content. Without alacrity, maintaining Berserk mode becomes challenging. It's crucial to sustain Berserk mode for its significant damage boosts, including increased crit chance, critical damage, and strike damage. However, in encounters with pauses or phases where you cannot damage enemies, it can be advantageous to let Berserk mode run out just before those pauses, so it's ready to activate again when you can resume damaging.
Dual Axes:
Dual axes are your primary weapon set, providing the highest damage output. The burst skill, Decapitate, has a high damage coefficient and recharges itself upon hitting enemies. The auto-attack chain is straightforward, with the final hit dealing the most damage. Cyclone Axe inflicts high damage and vulnerability and grants Fury. Throw Axe is a ranged execute skill, more effective against enemies with lower health. Dual Strike deals substantial damage and grants quickness twice for a total of 4 seconds. Whirling Axes is the most potent skill in terms of DPS per cast.
Longbow:
The longbow serves as a ranged option when melee range is not viable. While it lacks power damage compared to dual axes, it offers flexibility and higher cleave damage. Longbow skills are useful for breaking defiance bars when combined with skills like Headbutt and Wild Blow. Longbow 3 provides good power damage, while skills 4 and 5 apply crowd control effects.
Utilities:
For healing, True Berserkers have one option: Blood Reckoning. This skill acts as an immortality button, extending Berserk mode duration as long as you deal damage. It grants adrenaline, heals you on the cast, and heals you for 33% of outgoing damage for 5 seconds. It's an essential skill that allows you to push through damaging mechanics.
The remaining utility slots depending on the encounter. In open world, For Great Justice is recommended for higher Fury and might coverage. In group content, "Shattering Blow" is useful for sustaining Berserk mode by providing stability and damage and further extending Berserk mode duration. "Signet of Might" is another option that grants passive power, extending Berserk mode duration in fights with pauses. "Wild Blow" and "Outrage" are typically used to extend Berserk mode and frequently break stuns.
↖ Gear & Consumables
To maximize the effectiveness of the Power Berserker build, gear and consumables play an important role. We recommend using a mix of Assassin's and Berserker's gear, selecting pieces that allow you to reach 60% critical chance unbuffed and outside of Berserk mode. With 15% from Smash Brawler and 25% from Fury, this will put you at around 100% critical chance. If you're using exotic gear, you may need to mix in more Assassin's pieces or swap to precision food to cap out on the critical chance. Additional support and survivability can be achieved through traits and skill choices.
When it comes to sigils, you can run a combination of Force and Impact or Force and Air. Impact boosts cleave damage and adds damage versus stunned enemies, while Air provides marginal differences. In terms of consumables, Power and Ferocity food, along with the potent superior sharpening stone or an equivalent, are recommended for most content. You can also consider using a Bowl of Masterful Strength for a small power boost. Remember that the ascended version of a food is always better than not having it.
↖ Traits & Specializations
Moving on to specializations and traits, there are two specializations that are considered essential: Strength and Berserker. For the third specialization, you have the choice between Tactics and Discipline. In this guide, we will start with Strength, as it is included in both build variants.
Strength provides significant damage buffs, including a 5% increase to strike damage, an additional 10% for 6 seconds upon using a physical skill, power conversion to both vitality and ferocity and up to 21% increased damage upon using burst skills. It also makes your dodge supply might and damage enemies, restores endurance on hit with burst skills, and grants more power per stack of might (40 instead of 30). Finally, it provides a 5% crit chance increase for damage.
As the second core specialization for open-world content, Tactics offer utility and survivability. It grants a 10% increase in damage versus movement-impaired enemies, 1% damage for every boon on you, 25% more damage against targets above 80% health, and the ability to share might and quickness with allies when hitting with burst skills. We will revisit Tactics later when discussing survivability for the power DPS build. For group content, you can choose between Discipline and Tactics. Discipline provides improved weapon swapping, reduced burst skill cooldowns, and synergy with ax skills, offering increased strike damage and a lot of ferocity.
The last specialization, Berserker, focuses on maximizing strike damage. It offers a 25% damage boost, 300 power, and an additional 15% crit chance while in Berserk mode. Precision is also converted into ferocity, with the conversion doubling while in Berserk mode. These traits highlight the importance of remaining in Berserk mode as much as possible. Berserker specialization also provides quickness resistance and super speed.

↖ Adjusting for Survivability
In open world content, it's essential to make your build more forgiving to sustain yourself as a berserker. This involves providing Fury, might, and a good amount of quickness for yourself while maximizing the number of might stacks you generate per second. Additionally, you will be providing might and quickness to allies in your vicinity.
To adjust for survivability, follow this priority list for changes:
- Food and Trade Swaps: Start by adjusting your food and trades. Focus on might generation by synergizing traits like Might Makes Right and Strength and Mending Might in Tactics.
- Trait Choices: Use Brave Stride as your first trade to gain stability during movement skills for 5 seconds. Forceful Greatsword is essential for might generation, granting a 50% chance on critical hits to apply a stack of might to yourself and adding 120 power with a greatsword. These effects are doubled, ensuring healing with every second hit.
- Support Options: Empower Allies can be used to share might with allies every 10 seconds. Phalanx Strength turns you into a walking might bot, sharing every stack of might you apply to yourself with up to 5 allies, also healing you. Consider using a strength sigil instead of the impact sigil for additional self-healing.
- Armour Swaps: If needed, you can exchange a few armour pieces for knights to increase toughness at the cost of ferocity. Keep in mind that the playstyle requires aggression to heal.
- Weapon Options: In situations where being in melee range is too dangerous, you can swap to a longbow.
↖ Rotation Guidance
Now, let's discuss simplified berserker rotations that will allow you to concentrate on mechanics while performing well enough. These rotations focus on camping dual axes and maintaining berserk mode for the entire fight whenever possible. They work best in encounters without immunity phases or breaks. Remember to stay in the melee range for optimal execution.
Rotation 1: Discipline Variant
This rotation emphasizes berserk mode, extensions, and decapitate. Spam these skills as often as possible. Obtain 10 adrenaline to use decapitate again by using three hits with your axe skills or rage skills, as they also provide adrenaline. Use the following combos after each cast of decapitate: judging blow or outrage paired with a headbutt. The shattering blow should be used before, and outrage and blood reckoning should be used just as the stun applies. Outrage and blood reckoning will immediately reset decapitate, allowing you to use it again. When the headbutt's self-stun is bypassed, use the headbutt whenever you have stability. The cooldowns of the headbutt, outrage, blood reckoning, and wild blow should be used in the same order in each rotation loop. Each loop should take between 15 and 16 seconds.
Rotation 2: Tactics Variant
This rotation utilizes tactics instead of discipline, resulting in a lower adrenaline generation. You need to make use of your rage skills in a strict pattern, as they are the main source of quick adrenaline generation. After using the rage skills, you can always use decapitate directly. To fill up the adrenaline bar, you'll need to mix in some axe skills. A complete auto-attack chain per loop is possible in the tactics rotation. Try not to interrupt the chain after using all the adrenaline skills. Always prioritize decapitate.
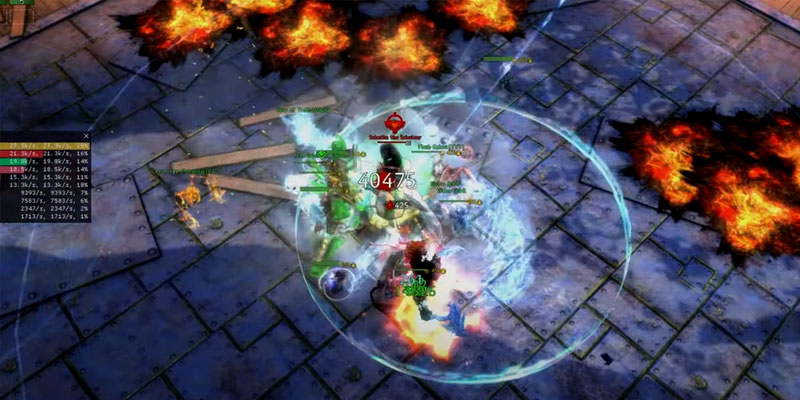
Both rotations provide around 36k DPS without Signet of Might. If you prefer higher bursts at the cost of berserk mode uptime, you can use Signet of Might instead of Shattering Blow. Outrage can be used to break the headbutt stun. Dual axe berserker rotation offers one of the most enjoyable rotations in the game, combining speed and engagement. While it takes practice to master and optimize, it is highly rewarding.
Conclusion:
We hope this guide has provided you with valuable insights into playing as a berserker in Guild Wars 2. Feel free to experiment with the rotations and adjust them to specific encounters. Dual axe berserker offers both high damage and supportive capabilities, making it a formidable choice in various PvE scenarios. Remember to practice and have fun as you embark on your berserker journey.
Most Popular Posts
- Guild Wars 2 Open World PvE Builds: Ranking & Tier List For 2023
- Guild Wars 2: Top 4 Best Maps To Farm Gold in 2023
- Guild Wars 2 Wizard's Vault Items: Tier List For Best and Worst
- How to get more gold with unidentified gear in Guild Wars 2, 2023?
- How to Get Research Notes Quickly and Efficiently in Guild Wars 2, 2023?
- How to Farm Gold Weekly with Imperial Favors | Guild Wars 2?
Popular Category Lists
- Path of Exile / (873)
- Diablo IV / (702)
- Runescape / (344)
- New World / (172)
- WoW Classic SoD / (171)
- Guild Wars 2 / (159)
- Elder Scrolls Online / (138)
- FFXIV / (135)
- World of Warcraft / (65)
- WOW Classic / (43)
- Elden Ring / (40)
- Throne and Liberty / (36)
- SWTOR / (35)
- Albion / (35)
- Last Epoch / (32)
- League of Legends / (30)
- Dark and Darker / (28)
- Fallout 76 / (27)
- WotLK Classic / (23)
- Genshin Impact / (22)