0
0
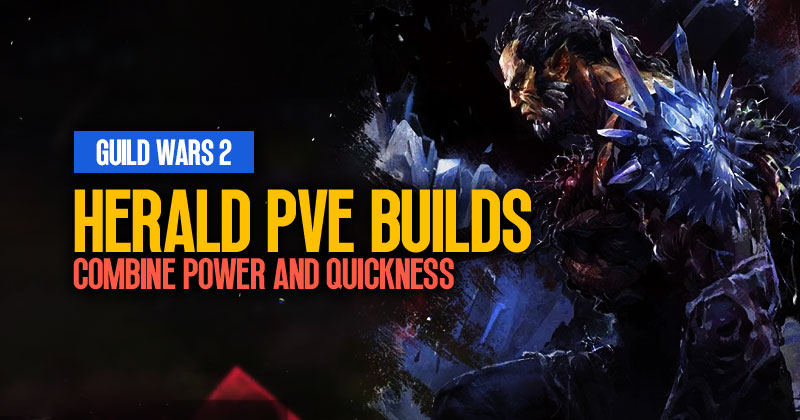
Guild Wars 2 Strongest Herald PvE Builds: Combine Power and Quickness
- Gertie
- Share
- Guild Wars 2
- 06/30/23
- 2505
Welcome to the Power Quickness Herald PvE Build Guide for Guild Wars 2! This build is known for its incredible power and quickness, making it one of the strongest builds. Not only will you boost your own damage, but you'll also provide essential boons and support to your group. Whether you're playing raids, strikes, fractals, or open world content, this build will make your teammates better just by having you in their presence. Let's dive into the details of the build.
↖ Weapons
Weapons are a crucial aspect of gameplay in many games, and in this build, we will discuss the weapons available and their various abilities.
Swords:
- Two swords are the best option for high DPS (damage per second).
- The auto attacks with swords provide good damage and apply vulnerability to enemies.
- Skill 2, called Saw, strikes enemies around you, chilling them and dealing bonus damage.
- If skill 2 hits only one enemy, skill 3, called Shadow Step, allows you to teleport around nearby foes, granting you a 1.5-second evade and might on every strike.
- Skill 4, named Outstanding Strike, applies eight stacks of vulnerability, deals significant damage, and immobilizes enemies. The duration of immobilization increases the more enemies you hit.
- Skill 5, known as Teleport Strike, shadow steps you to your enemy, grants you eight seconds of fury and delivers a second strike if it hits. This skill can also be used to teleport closer to enemies when they are out of range, providing extra mobility.
Staff:
If you need crowd control or have power-related abilities, you will likely use the staff.
- The auto attack with the staff applies strike damage and heals nearby allies.
- Skill 2, called Weakness, applies weakness, deals damage, and heals nearby allies. The healing is more significant if you hit an enemy.
- Skill 3, known as Block, gives you a 2-second block, which can be a lifesaver and save you from using a dodge. It also blinds enemies at the end of the cast.
- Skill 4, named Healing Wave, heals allies around you and removes two conditions. It is also a blast finisher, allowing you to trigger combo finishes.
- Skill 5, called Charge, is the main reason to use the staff. It allows you to charge forward, attacking nine times and knocking back enemies with each strike. Additionally, you evade while charging forward. If all nine attacks land, you will deal a massive 1350 brake bar damage, making it extremely effective for breaking enemy defenses.
↖ Legends
We will discuss the Power Quickness Herald build, focusing on the two main legends: Glint and Shiro. This build offers high personal damage and quickness support for your allies. Glint is essential for this build, while Shiro can be swapped out depending on the encounter. We will discuss the specific use cases for each legend and the effects they have on your gameplay.
Glint:
- When in Glint, all skills become facet skills.
- Facet skills can be toggled on to provide boons to your allies.
- Consuming these facets grants you access to active power effects but removes the pulsing boons.
- Quickness is gained when consuming facets.
- Facet of Nature is a skill that has various effects depending on your current legend.
- While in Glint, the passive effect grants an extra 20 boon duration to any boons you apply.
- Consuming Facet of Nature in Glint increases the duration of all allies' boons by two seconds (three seconds with a specific trait).
- It is recommended to consume facets while in Glint for the maximum boon duration.
Shiro:
- While in Shiro, the passive effect grants allies life steal when they attack, increasing the group's overall damage.
- We are consuming the facet while in Shiro can strip two burns from nearby enemies, useful for clutch boon strip situations.
- The passive effect while in Jalis reduces incoming damage to allies by 10, providing a smoother boss kill the experience.
- Consuming the facet in Jalis grants two stacks of stability to your allies, but this is usually replaced by Inspiring Reinforcement.
- The passive effect of Facet of Light pulses regeneration to nearby allies, providing healing and utility.
- Consuming Facet of Light allows you to ignore incoming damage and convert it to healing, which is useful for surviving mechanics.
- Facet of Strength's passive pulses might go to nearby allies, and consuming it grants a damage modifier buff for 10 seconds.
- Facet of Elements pulses swiftness and lays down an AoE attack with weakness, chill, and burning.
- Facet of Darkness pulses fury and can blind enemies, reveal them, and break stun on yourself.
- Facet of Chaos pulses protection and can knock back enemies, deal damage, and grant super speed to nearby allies.
Other Legends:
- In Shiro, Enchanted Daggers summons daggers that siphon health from targets.
- Reposting Shadows removes movement and parry conditions, granting fury.
- Phase Traversal supports the movement towards your target and makes attacks unblockable.
- Impossible Odds provides increased movement speed and an additional strike to enemies.
- Jade Winds is a large AoE stun but consumes a lot of energy.
- In Jalis, Soothing Stone heals and removes conditions from yourself, providing resolution against condition damage.
- Inspiring Reinforcement offers group-wide stability.
- Force Engagement provides break bar damage and reduces damage taken from taunted enemies.
- Vengeful Hammers replaces Impossible Odds and reduces strike and condition damage taken.
- Summiting the Great Dwarf breaks stuns for five people and grants a significant damage reduction.
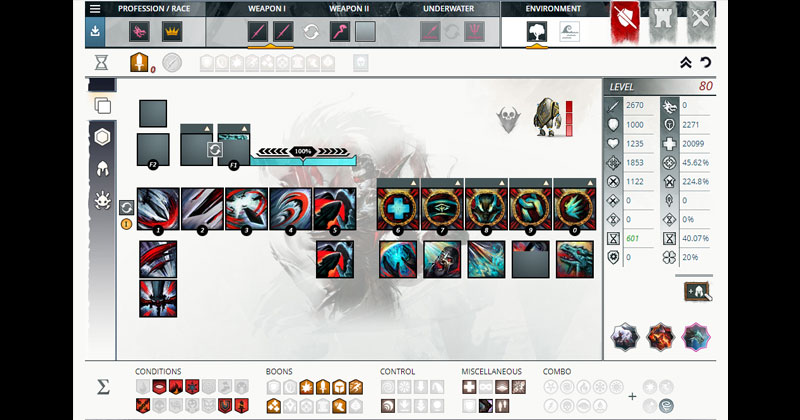
↖ Traits
Traits play a crucial role in optimizing the power-based Quickness Herald build for revenants in Guild Wars 2. Here is a guide to help you understand and utilize the traits effectively:
Devastation Line:
- This line focuses on damage modifiers to enhance your overall damage output.
- Swift Termination can be swapped out for Dance of Death if you require additional survivability. However, in most group content, this should be optional.
- Fill out the middle row of traits to maximize damage potential.
Invocation Line:
- This line provides damage modifiers and fury generation.
- The trait Royally Miss increases the crit chance obtained from Fury, giving you a valuable buff.
- Spirit Boon allows you to apply additional boons whenever you swap legends. This is particularly important when you swap to Jalis, as you can apply stability to nearby allies, helping to ignore incoming crowd control effects.
Herald Line:
- The Herald trait line is essential for the entire build to function properly.
- Core Value improves the effect of the True Nature skill, which is commonly used when wearing Glint to extend the duration of allies' boons by three seconds instead of the standard two seconds.
- Shared Empowerment enables you to apply might to nearby allies whenever you grant them boons, including yourself. This trait helps maintain approximately 13 stacks of might in your subgroup, which is highly beneficial.
- Reinforced Potency, a minor trait, grants extra concentration and increases damage based on the number of active boons you have. This trait provides additional boon duration and damage without any cost.
- Draconic Echo is a crucial trait that makes the entire build function smoothly. It allows you to grant quickness whenever you consume one of your facets. Furthermore, it lets you retain the passive bonuses of your facets for six seconds after consumption. Take advantage of this trait in your rotation to continue pulsing.
↖ Gear, Food, and Utilities
The rotation for this build is fairly straightforward and revolves around maintaining the quickness and maximizing power damage. Here is a step-by-step guide on how to execute the rotation effectively:
- Start by activating your utility skills, such as Impossible Odds and Renewing Wave, to gain boons and increase your damage output.
- Use your weapon skills in the following order: Auto-attack chain, Unrelenting Assault, and Soulcleave's Summit. These skills provide good damage and also help in generating energy for more utility skills.
- Keep an eye on your energy bar and use your utility skills accordingly. Soulcleave's Summit should be used whenever it is off cooldown to heal yourself and maintain energy.
- Make sure to activate your elite skill, Orders from Above, whenever possible, as it provides a significant damage boost and also helps in recharging your energy.
- Maintain your quickness boon on your group members by using Facet of Nature and Citadel Bombardment whenever they are off cooldown. Prioritize quickness uptime over personal damage during group encounters.
- Use your healing skill, Natural Harmony, whenever you need to recover health. It also provides additional boons to you and your allies.
- Keep an eye on your endurance bar and dodge or use your F2 skill, Razorclaw's Rage, to avoid incoming attacks or to quickly reposition yourself.
- Continuously monitor your energy and boon duration to ensure that you can maintain quickness and maximize your power damage throughout the fight.
- When your energy is low, use your auto-attacks and weapon skills to regenerate energy and build up for another burst of utility skills.
- Repeat the rotation, adjusting as needed based on the encounter mechanics and the movement of your group.
Power Quickness Herald PvE Build Links: https://tinyurl.com/3jnd8mjw!
↖ Rotation
The rotation for Quickness Herald in Guild Wars 2 can be adapted as fights progress, but there are some general guidelines to follow. Here is a step-by-step guide:
Opener:
- Activate all facets except for facet of chaos.
- Quickly pop all facets for quickness: facet of light, facet of nature, facet of Strength, facet of elements, and facet of darkness.
- Activate and consume facet of chaos.
- Swap to Shiro legend.
In Shiro Legend:
- Immediately activate Impossible Odds.
- Use sword skills 4 and 5.
- Use sword skill 2 in the auto attack chain.
- Use sword skill 3 in the auto attack chain.
- Swap back to Glint Legend.
In Glint Legend:
- Activate and consume both passes of Strength and elements.
- Activate the facet of darkness.
- Use sword skills 4 and 5 as soon as they are available.
- Activate facet of nature and the facet of chaos.
- Use sword skill 2 in the auto attack chain until sword skill 2 is available.
- Activate and consume facet of light.
- Consume facet of chaos.
- Use sword skill 2 in auto attack chain.
- Consume facet of darkness.
- Consume facet of nature.
- Activate and consume both facets of Strength and elements.
- Swap back to Shiro legend.
Adapting the Rotation:
- Maximize uptime of facet of strength buff by using it first and last in the rotation when in Glint legend.
- Facet of darkness and facet of elements have the same cooldown, so pair them up for efficiency.
- Activate facet of darkness as soon as you swap to Glint legend and activate it just before swapping back to Shiro legend. This provides fury and can be used as a stun break if needed.
- Use sword skill 2, 4, and 5 off cooldown, but try not to interrupt your sword auto-attack chains if possible.
- Consume facet of nature just as you are exiting Glint legend to get the boon extension and retain the passive for six seconds when swapping to the other legend. This allows your team to benefit from lifesteal or damage reduction from Shiro or Jalis Legends, respectively.
Conclusion:
The Power Quickness Herald build is a powerful and versatile support build that excels at providing boons, dealing damage, and offering utility in various game modes. With this build, you can greatly enhance your team's performance and make a significant impact in any content you engage in. Experiment with the rotation and adapt it to different encounters to maximize your effectiveness.
Most Popular Posts
- Guild Wars 2 Open World PvE Builds: Ranking & Tier List For 2023
- Guild Wars 2: Top 4 Best Maps To Farm Gold in 2023
- Guild Wars 2 Wizard's Vault Items: Tier List For Best and Worst
- How to get more gold with unidentified gear in Guild Wars 2, 2023?
- How to Get Research Notes Quickly and Efficiently in Guild Wars 2, 2023?
- How to Farm Gold Weekly with Imperial Favors | Guild Wars 2?
Popular Category Lists
- Path of Exile / (873)
- Diablo IV / (702)
- Runescape / (344)
- New World / (172)
- WoW Classic SoD / (171)
- Guild Wars 2 / (159)
- Elder Scrolls Online / (138)
- FFXIV / (135)
- World of Warcraft / (65)
- WOW Classic / (43)
- Elden Ring / (40)
- Throne and Liberty / (36)
- SWTOR / (35)
- Albion / (35)
- Last Epoch / (32)
- League of Legends / (30)
- Dark and Darker / (28)
- Fallout 76 / (27)
- WotLK Classic / (23)
- Genshin Impact / (22)