Guild Wars 2 Silent Surf Fractal Challenge: Everything You Need To Know
- Gertie
- Share
- Guild Wars 2
- 07/21/23
- 2531
Welcome to the Silent Surf Fractal Challenge Mode guide in Guild Wars 2. This comprehensive guide will help you successfully complete the challenge mode and work towards obtaining the title, which requires finishing the fractal without anyone in the party dying. We'll cover the recommended compositions, mechanics, and strategies for each phase of the encounter.
- What is Silent Surf Fractal?
- Composition
- Mechanics
- Strategies for Each Phase
- How to start for the Silent Surf Fractal in Guild Wars 2?
- How to Skip the Annoying Mechanic in Silent Surf Fractal?
- How to Master the Silent Surf Fractal With Finesse?
↖ What is Silent Surf Fractal?
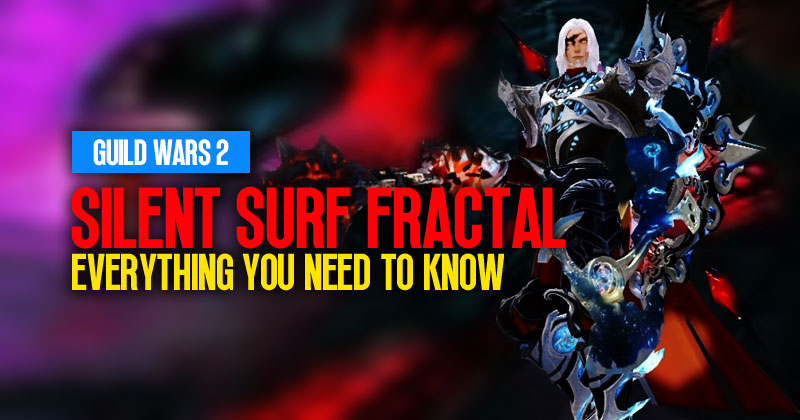
The Silent Surf Fractal is an instance within Guild Wars 2 where players face an array of trials and obstacles, combining platforming, puzzle-solving, and combat elements. Set in a breathtaking underwater environment, the fractal is known for its stunning visuals and immersive gameplay. To begin your journey, access the Fractals of the Mists hub, where you'll find the portal leading to this captivating experience.
↖ Composition
For the Silent Surf Fractal Challenge Mode, it's advisable to have the following composition:
- Range Damage: You'll need some range damage, as players often have to split up during the encounter.
- Boon Removal: Boon removal is crucial for dealing with the boss's Boon steal mechanic. Specters and scourges are great choices as they offer boon removal, crowd control (CC), and range damage.
- CC (Crowd Control): As the fight progresses, you'll need more CC to handle the increasing difficulty of the break bar mechanic.
↖ Mechanics
- Boon Steal Mechanic: The boss will create two orange circles, and an arcing light projectile will land in them. This projectile will steal your boons and grant them to the boss, making it stronger. Move out of the circles to avoid the steal mechanic, as you cannot dodge through it.
- Break Bar Mechanic: This mechanic occurs every 10% above 50% and every 5% below 50% of the boss's health. If the break bar isn't broken, an Aspect of Canoxide will be summoned. Players must go to the outer platforms to deal with the Aspect, or the boss will receive increased damage. As the fight progresses, breaking the break bar becomes more difficult, requiring more CC.
- Roman Numerals Mechanic: Players will get numbers over their heads, and if hit by two attacks, they will instantly die. Spread out to avoid accidentally running into each other. The damage cannot be dodged but can be blocked. Players should stay still during this mechanic and avoid casting skills to prevent any accidental movements.
- Dread Visage Mechanic: The boss will have a bright eye icon above its head, and when it flashes, players will likely die. Avoid looking at the eye by holding the right mouse button to change your character's facing direction, and use the left mouse button to check if the mechanic is over. Look off the edge of the platform to minimize the risk of being seen by the eye.
- World Cleaver Mechanic: At 66% and 33% health, three Aspects of Canoxide will tether to specific players. These players must go to the outer platforms to defeat the Aspects; otherwise, the World Cleaver will wipe out the entire party. The healer may get tethered, making it challenging to kill the Aspects quickly. Having a hybrid healer can be helpful, emphasizing cleansing over healing, or a DPS player can take the tether instead.
↖ Strategies for Each Phase
Phase 1 (100% - 66%):
- Spread out during the Roman Numerals mechanic.
- Stay patient and avoid the Boon steal mechanic.
- Break the boss's break bar at 90% health.
Phase 2 (66% - 33%):
- Continue avoiding mechanics and breaking the break bar at 45% health.
- Tether to an Aspect of Canoxide during the World Cleaver mechanic, kill it quickly, and return to the main platform.
- Look away from the boss during the Dread Visage mechanic, either using the grappling hook to return or wait to get ported back.
Phase 3 (33% - 0%):
- Repeat the strategies from Phase 2.
- Ensure proper CC during the World Cleaver mechanic, as it becomes more challenging.
↖ How to start for the Silent Surf Fractal in Guild Wars 2?
| Step | Objective | Key Actions/Notes |
|---|---|---|
| 1 | Equipping Utility Items | Click on the box near the starting point. |
| 2 | Parachuting and Grappling | Jump into the pit, press '2' for parachute, '1' for grappling hook. |
| 3 | Zip Lines and Safe Landings | Use '2' for zip lines, '1' or '2' to break the fall, '5' for flares. |
| 4 | Triggering a Small Fight | Stand in the circle to trigger a fight, defeat enemies. |
| 5 | Bouncing and Gliding | Use the box, bounce off jumping mushroom, grappling hook to stalactite, parachute glide ('3' for rocket boost). |
| 6 | Wind Cannon and Team Coordination | Use wind cannon, gather four players in the circle, defeat enemies. |
| 7 | Mislok Singularity and Ziplines | Use Mislok Singularity to reach zipline, parachute to correct course. |
| 8 | Facing the Eye and Coordinating Attacks | Avoid looking at the eye, coordinate in the team with numbers ('dodge' red circles). |
| 9 | Final Boss Fight | Avoid red circles, dodge spinning weapons, adjust environment zone ('dodge' large hit spell). |
| 10 | Dealing with the Large Hit Spell | Dodge orange beams ('run' toward islands). |
| 11 | Defeating the Final Boss | Use special action key, grapple hook to an island, defeat ads, dodge explosive attack. |
| 12 | Victory! | Successfully complete the Silent Surf Fractal. |
↖ How to Skip the Annoying Mechanic in Silent Surf Fractal?
The Silent Surf Fractal introduces an annoying mechanic where you are given only one parachute and no other tools until the specific event triggers. However, there is a way to bypass this limitation and have all the necessary GW2 items right from the start.
- Initial Setup: Assemble your fractal party and enter the Silent Surf Fractal. Proceed until you reach the point just before the boss encounter where the annoying mechanic begins.
- Backtrack to the Portal: At this point, have your party members backtrack through the fractal until they reach the portal or entrance area.
- Interact with the Portal: Upon reaching the portal or entrance area, interact with it to get a little kit. This kit will grant each member four stacks of everything they need, including the parachute, grappling hook, and black powder charge.
- Please return to the Boss Area: After obtaining the little kit and its associated items, return to the Boss area, where the annoying mechanic awaits.
- Prepare for the Jump: Now that your party members have all the necessary tools, you can proceed with the boss encounter as usual. Approach the designated jumping area and get ready to perform the required jump.
- Use the Parachute, Grappling Hook, and Black Powder Charge: Utilize the parachute, grappling hook, and black powder charge in sequence to navigate through the jumping puzzle effortlessly. Coordinate with your party members to ensure a smooth and efficient run.
- Defeat the Boss: Once you've successfully navigated the jumping puzzle, you'll arrive at the boss fight fully equipped. Engage the boss and use your newly acquired skills and equipment to defeat it.
- Enjoy the Rewards: Congratulations! By following this method, you've bypassed the annoying mechanic and completed the Silent Surf Fractal with ease. Now, enjoy the rewards and continue your adventures in Guild Wars 2!
↖ How to Master the Silent Surf Fractal With Finesse?
- Get the Utility Items: Click on the box to acquire the necessary utility items for the fractal.
- Parachute and Grappling Hook: Jump into the pit and press '2' to activate your parachute. Use the '1' key to grapple to the next pit.
- Zip Lines: Utilize the two zip lines to reach your next destination safely.
- Falling Safely: Use either '1' or '2' to break your fall when landing. If needed, deploy flares for a smoother landing.
- Trigger the Fight: Stand in the circle to initiate a small fight. Take down the enemies that spawn.
- The Next Area: Use the box again to progress further. Jump down and bounce off the jumping mushroom, then grapple to the stalactite. Glide to the next landing spot with your parachute.
- Rocket Boost: Use skill '3' to propel yourself forward, and use it again if necessary.
- Wind Cannon: When you reach the next area, use the wind cannon to progress. Stand in the circle with four people to deal with the enemies.
- Mislock Singularity: Utilize the Mislock Singularity and supply to wind cannon up to a zipline automatically.
- Precision Landings: If you find yourself off course, adjust your direction with the parachute to land on the intended spot.
- Grappling Hook & Ledge: Use your grappling hook to reach another ledge. If needed, use the parachute or grapple the wall to break your fall.
- Another Fight: Once again, stand with four people in the circle to trigger a fight against attackers.
- The Eye Mechanic: When facing a new attacker, turn away from the eye whenever it becomes visible to avoid fear and damage.
- Red Circles & Numbered Attacks: If you get red circles, split up, and remember the numbers. The boss will hit each player in that order, so dodge the damage accordingly.
- Final Boss Fight: Look away from the eyes, as there are more of them now. When you get a red circle, run it out of the group before it drops on the ground.
- Managing the Boss Break Bar: Every 10% of the boss's health, he gains a break bar. Coordinate with CC (crowd control) him effectively, as his next CC will be harder if you fail.
- Large Hit Spell: At 66% and 33% health, the boss will cast a large hit room spell. Players will be charged with orange beams. Running toward an ad helps, which will move it to one of the islands.
- Explosion Mechanic: Special action key to get gadgets back out. Grappling hook to the island and kill the ad. The explosion is dodgeable, but if you fail to kill all ads, try to dodge roll it.
- Boss's Health to Zero: Keep up the pressure and defeat the boss to win the fight.
Conclusion
Completing the Silent Surf Fractal Challenge Mode requires precision, patience, and teamwork. Be proactive during the World Cleaver phases, communicate effectively, and stay vigilant during mechanics. Remember, survival is key to success. Following these strategies will help you achieve your first clear or obtain the coveted title without anyone in the party dying. Good luck, and enjoy your adventures in Guild Wars 2!
Most Popular Posts
- Guild Wars 2 Open World PvE Builds: Ranking & Tier List For 2023
- Guild Wars 2: Top 4 Best Maps To Farm Gold in 2023
- Guild Wars 2 Wizard's Vault Items: Tier List For Best and Worst
- How to get more gold with unidentified gear in Guild Wars 2, 2023?
- How to Farm Gold Weekly with Imperial Favors | Guild Wars 2?
- How to Get Research Notes Quickly and Efficiently in Guild Wars 2, 2023?
Popular Category Lists
- Path of Exile / (873)
- Diablo IV / (702)
- Runescape / (344)
- New World / (172)
- WoW Classic SoD / (171)
- Guild Wars 2 / (159)
- Elder Scrolls Online / (138)
- FFXIV / (135)
- World of Warcraft / (65)
- WOW Classic / (43)
- Elden Ring / (40)
- Throne and Liberty / (36)
- SWTOR / (35)
- Albion / (35)
- Last Epoch / (32)
- League of Legends / (30)
- Dark and Darker / (28)
- Fallout 76 / (27)
- WotLK Classic / (23)
- Genshin Impact / (22)


 0
0
