0
0
WotLK Classic Icecrown Citadel Boss Guide: Tips and Tricks | Normal and Heroic Mode
- Whaley
- Share
- WotLK Classic
- 10/14/23
- 8005
Welcome to our detailed guide for Icecrown Citadel in the World of Warcraft: Wrath of the Lich King Classic. In this guide, we will walk you through the strategies for both normal and heroic modes, providing valuable tips and insights to help you conquer the challenges within this iconic raid. The Icecrown Citadel is a formidable fortress with various bosses, and we'll delve into each encounter, sharing strategies and recommendations to ensure your success.
- Boss 1: Lord Marrowgar
- Boss 2: Lady DeathWhisper
- Boss 3: Gunship Battle
- Boss 4: Deathbringer Saurfang
- Boss 5: Festergut
- Boss 6: Rotface
- Boss 7: Professor Putricide
- Boss 8: Blood Prince Council
- Boss 9: Blood-Queen Lana'thel
- Boss 10: Valithria Dreamwalker
- Boss 11: Sindragosa
- Boss 12: The Lich King

↖ Boss 1: Lord Marrowgar

Lord Marrowgar is the first boss you'll encounter in Icecrown Citadel. He has one phase that involves several abilities you must manage. Here's how to handle him:
- Tank Positioning: Place the boss in the middle of the room, with tanks on one side and ranged DPS on the other. This setup helps in handling his abilities effectively.
- Tank Buster: Lord Marrowgar has a tank buster ability that hits the main tank and the two closest players. To mitigate the damage, use three tanks and stack them together.
- Cold Flame: This ability is a line of fire from the boss that targets a player at random. Simply sidestep it to avoid taking damage.
- Bone Spikes and Impale: Lord Marrowgar uses Bone Spikes to impale and incapacitate a player, dealing substantial damage. Ensure players are healed promptly, and focus on killing the spikes as quickly as possible.
Heroic Mode:
On heroic, Lord Marrowgar targets three players with Bone Spikes, requiring quick action to save them. Additionally, he casts Bone Storm every 30 seconds, dealing raid-wide damage. He charges at random players, leaving behind cold flame, so be vigilant.
- Avoid Standing in Fire: Lord Marrowgar charges at players after spinning. Make sure to move away to avoid standing in the fire.
- Aggro Reset: After spinning, Lord Marrowgar resets aggro, giving your tanks a moment to regain control before resuming the fight.
↖ Boss 2: Lady DeathWhisper

Lady DeathWhisper presents a two-phase encounter. In Phase 1, you'll need to manage adds and break her Mana Shield to transition to Phase 2. Here's what you need to know:
- Ad Phase: Lady Death Whisper spawns several adds in Phase 1. Assign tanks to each side and decide whether to split the melee or keep them in a "death ball" to deal with the adds efficiently.
- Ad Types: There are two types of adds, Fanatics, and Adherents. Fanatics provide a healing absorb and a damage buff that can be stolen or purged. Adherents inflict a disease and a curse that increases spell cooldowns. Cleanse the curse promptly. Both add types gain additional abilities when empowered.
- Empowered Adds: Empowered Fanatics deal 100% more damage and have a frontal cleave. Empowered Adherents cast single-target bolts and AoE spells. If any of them cast Marrowmaw, they transform into skeletons or cultists, becoming immune to physical or magical damage, respectively.
- Managing Ads: Assign tanks to each side and engage in AoE damage to eliminate the adds quickly. Watch for Phase 2 transitions to avoid additional adds.
- Phase 2: Lady Death Whisper's abilities change in Phase 2. She continues to cast spells and abilities, and her threat generation decreases. Make sure to manage threat effectively.
Heroic Mode:
On heroic, Lady Death Whisper Mind Controls a few players, so you must crowd control or purge their buffs. Ad waves spawn and must be picked up. Coordination is key.
- Phase 2 Tanking: In Phase 2, she requires tanking and applies a debuff that reduces threat, so swap tanks accordingly.
↖ Boss 3: Gunship Battle

The Gunship Battle has a straightforward objective: destroy the enemy ship using the cannons. Here's how to tackle this encounter:
- Cannoneers: Assign four players to operate the cannons and fire at the enemy ship. Use "Cannon Blast" to generate heat and "Explosive Shot" to deal damage to the enemy.
- Mage on Enemy Deck: A mage appears on the enemy deck, freezing the cannons. Send a tank to jump over and eliminate the mage.
- Rifleman and Ax Throwers: Players not in cannons should focus on killing the Rifleman and Ax Throwers on the opposite deck.
- Avoid Missiles: Dodge slow-moving missiles with a knockback effect on heroic difficulty. Be ready to defend against portal-spawned ads that must be picked up by a tank.
Heroic Mode:
On heroic, enemies deal higher damage all around. Healers should focus on keeping the tank alive. Coordination and speed are essential to success.
↖ Boss 4: Deathbringer Saurfang

Deathbringer Saurfang features only one phase, but his damage increases as the fight progresses. Here's how to handle this fight:
- Damage Stacks: Saurfang gains damage stacks with each attack from him or the adds. At 100 energy, he marks a player with a permanent debuff, causing them to take melee damage. Healers need to monitor these players carefully.
- Rune of Blood: The tank receives a debuff that heals Saurfang. Swap tanks on every cast.
- Blood Over: Deals splash damage to a ranged target. Ranged players should spread at least 12 yards apart to avoid multiple hits.
- Bone Spikes: Saurfang summons five adds, which players must quickly eliminate. These adds deal damage to anyone they reach. Use stuns, pushes, or slows to stop them.
Heroic Mode:
On heroic, the adds deal triple damage and slow players nearby. Eliminate them quickly, particularly in the last 30% of the boss's health when his damage and attack speed increase.
- Manage Marked Players: Avoid letting marked players die, as they will heal Saurfang if they die with the debuff.
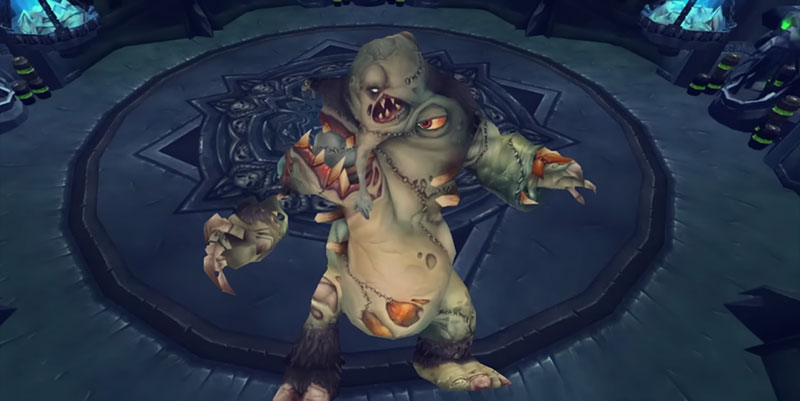
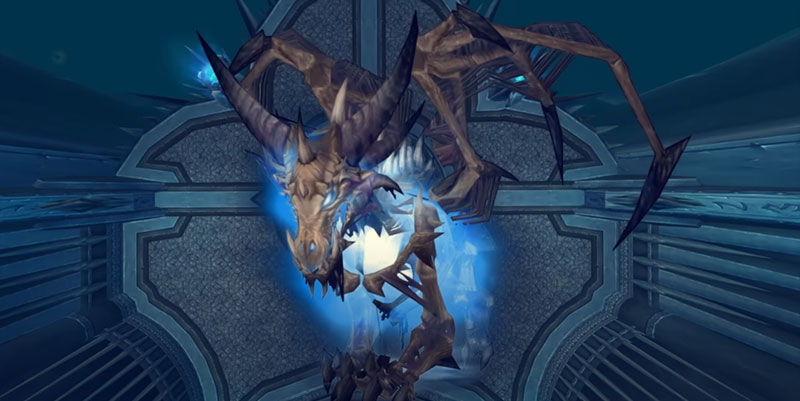
↖ Boss 5: Festergut
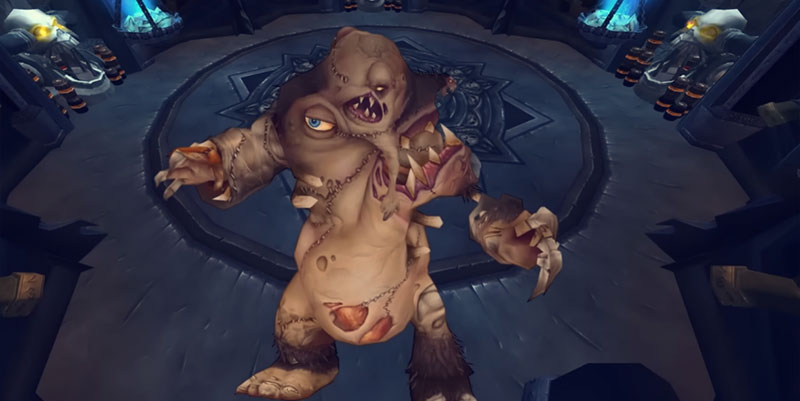
Festergut is a DPS race with a strict 5-minute enrage timer. Here's how to defeat this boss:
- Bile Gas: Deals splash damage and disorients a few players. Avoid getting hit, and move away from affected players.
- Gas Spores: Target three players and explode, applying a damage-over-time effect. Spores should be spread among the raid, including melee, to allow players to get hit without stacking the dot. Each player can receive one stack per Spore wave.
- Inhale: Festergut reduces raid-wide ticking damage but increases his damage and attack speed by 30%. Use personal cooldowns during this phase to survive.
- Gastric Bloat: A stacking dot with a damage buff. Swap tanks at nine stacks to avoid reaching ten stacks and causing an explosion that kills everyone.
Heroic Mode:
On heroic, Festergut's damage is higher, making this a more challenging encounter. Healers need to be especially attentive, and players should watch for their stacks and timers to prevent refreshing the dot.
↖ Boss 6: Rotface
Rotface is the second boss you'll encounter in the Plagueworks, and this encounter requires precise tanking and positioning. Here's how to tackle the Rotface encounter:
- Ooze Quarters: Stay in the middle to avoid shifting ooze covering a quarter of the room at a time.
- Slime Spray: Watch out for Rotface's random frontal attack, Slime Spray. Move away when targeted.
- Mutated Infection: It's a DoT that reduces health. Dispel it carefully. The dispelled player spawns an uncontrollable add.
- Dealing with Mutated Infections: When two players have Mutated Infection, one should move between the add and the room's edge before dispelling it.
- Kiting the Big Add: The merged add needs an off-tank or DPS to kite it. Keep it away from the raid.
- Exploitative Behavior: The merged add shoots missiles at five stacks. Move when you see missiles coming.
Heroic Mode:
- Vile Gas: Ranged players explode on heroic. Keep them 10 yards apart from melee to avoid disorientation.
- Enhanced Healing Reduction: In heroic, the Mutated Infection's healing reduction is stronger. Move for dispelling immediately.
↖ Boss 7: Professor Putricide
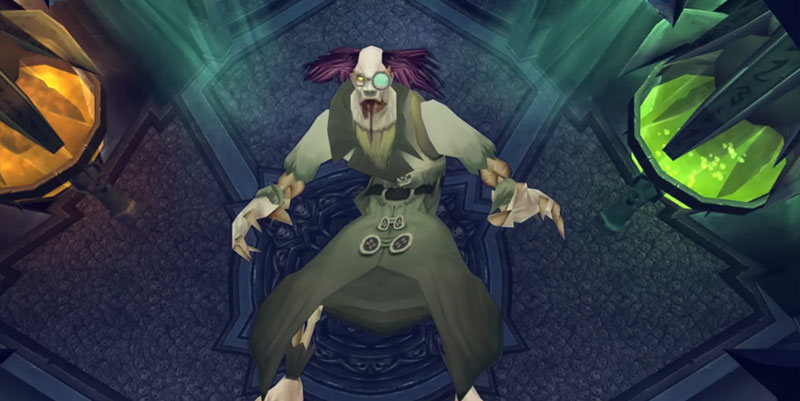
Professor Putricide abilities are mainly related to positioning and awareness. Here's how to approach this fight:
- Malleable Goo: Professor Putricide throws Malleable Goo at random players, which bounces several times before hitting. Players must move away from its path to avoid damage.
- Rot Face: Rot Face has a simple tank-and-spank mechanic, but positioning is essential due to the ooze covering the outer edges of the room.
- Mutated Infection: A DoT with a health reduction that should be dispelled when players are affected. However, when dispelled, they spawn an add that can't be taunted but can be crowd-controlled.
- Big Ooze: When two Mutated Infections collide, they merge to form a larger add that must be kited by an off-tank to prevent it from reaching the boss.
Heroic Mode:
On heroic, the empowered damage of Malleable Goo is higher, so players should be more vigilant about avoiding it. Additionally, the healing reduction from Mutated Infection is more potent, requiring players to quickly dispel it.
↖ Boss 8: Blood Prince Council

The Blood Prince Council consists of three bosses with shared health and distinct abilities. Every 45 seconds, one boss becomes empowered. Here's how to manage this complex encounter:
- Empowered Rotation: The three bosses rotate being empowered, changing their abilities. Adjust your focus accordingly.
- Prince Valanar: Targets players with Shadow Traps that must be avoided. Also, he casts Shock Vortex, dealing splash damage to players hit. Spread out to minimize damage.
- Prince Taldaram: Uses Glittering Sparks, applying a heavy DoT to players hit. He also casts Conjure Flame at a ranged player, which deals less damage over time but explodes, dealing splash damage to nearby players.
- Prince Keleseth: Utilizes Shadow Lance, a high-damage ability. He also spawns Dark Nuclei adds that channel a shadow resistance debuff on their target. These adds must be picked up by the tank.
Heroic Mode:
On heroic, Shadow Lance hits harder, requiring multiple stacks of the debuff to survive. Players must be cautious about the increased damage. The entire raid also gains Shadow Prison, which deals ramping damage while moving but does nothing while standing still. Proper positioning is critical.
↖ Boss 9: Blood-Queen Lana'thel

Blood-Queen Lana'thel presents a two-phase encounter. In Phase 1, you'll need to handle her abilities and gradually transition to Phase 2. Here's what you need to know:
- Swarming Shadows: Drops purple fire under a random player. Ensure they place it against a wall to prevent damage to the group.
- Pact of the Darkfallen: Links three players with red beams. They must hug each other to remove the debuff.
- Twilight Bloodbolt: Targets a ranged player, causing them to deal splash damage. Ensure ranged players spread out to minimize damage.
- Blood Mirror: Links the main tank with the closest person. Ensure proper positioning and tank rotation.
- Vampires: Blood-Queen Lana'thel transforms DPS players into vampires, increasing their damage by 100%. These players must bite someone new within 1 minute or risk becoming mind-controlled.
- Bite Order: Organize a bite order, starting with top DPS players. Avoid having a vampire run out into ranged DPS by ensuring the first bite goes to a melee player.
- Air Phase: Blood-Queen Lana'thel flies into the air at specific intervals, fearing everyone. After the fear, players must spread out to avoid taking damage from Bloodbolts.
Heroic Mode:
On heroic, the fear during the air phase is replaced by raid-wide damage. Players must manage the incoming damage and ensure the bite order continues smoothly.
↖ Boss 10: Valithria Dreamwalker

Valithria Dreamwalker is a unique encounter where your primary objective is to heal the boss to achieve victory. Here's how to manage this fight:
- Healing Task: Valithria Dreamwalker relies on healing to win the encounter. Bring as many healers as possible, including single-target healers. Focus on keeping the boss alive and maintaining high healing output.
- Nightmare Clouds: Throughout Phase 1 and 2, Valithria spawns Nightmare Clouds, which provide a healing and damage buff. Ensure your DPS players do not take these buffs as they can be used to increase your damage. Healers should enter the portals to maintain these buffs.
- Tank and DPS Groups: Split your DPS and tanks into two groups for each side of the room. This setup allows you to handle the adds effectively.
- Ad Waves: Ad waves spawn in the encounter. Top priority is to deal with skeletons, followed by suppressors, arcane mages, zombies, and then reavers.
- Coordination: Properly manage the Ad waves while maintaining healing on Valithria. Do not allow her health to drop too low.
Heroic Mode:
Heroic difficulty replaces the individual portals with an all-raid portal. Stack up and move slowly to dodge falling debris and maintain healing.
↖ Boss 11: Sindragosa
Sindragosa has a health-based phase and two intermissions. Here's how to handle this encounter:
- Phase 1 Abilities: During Phase 1, you will deal with abilities like Bile Gas, Gas Spores, and Inhale. Avoid taking excessive damage, and manage your stacks and debuffs.
- Ice Spheres: Sindragosa sends Ice Spheres towards the raid, which explode if they reach players. Ranged DPS should eliminate these spheres.
- Transition to Phase 2: At 70% health, Sindragosa enters an intermission phase, and players should move to the edges to avoid the AOE damage in the center. Deal with Raging Spirits, and remember to dispel the final plague away from other players.
- Phase 3 Abilities: Phase 3 is similar to Phase 1, but Sindragosa now freezes a random player in an Ice Block area, increasing the challenge.
- Shadow Traps: Be cautious of Shadow Traps and avoid standing in them to prevent damage.
Heroic Mode:
Heroic mode involves additional challenges, such as raid-wide damage during Ice Spheres and increased empowered damage, making this encounter more difficult.
- Shadow Prison: In the third phase, the entire raid suffers from Shadow Prison, dealing ramping damage while moving. Be careful not to refresh stacks accidentally.
↖ Boss 12: The Lich King
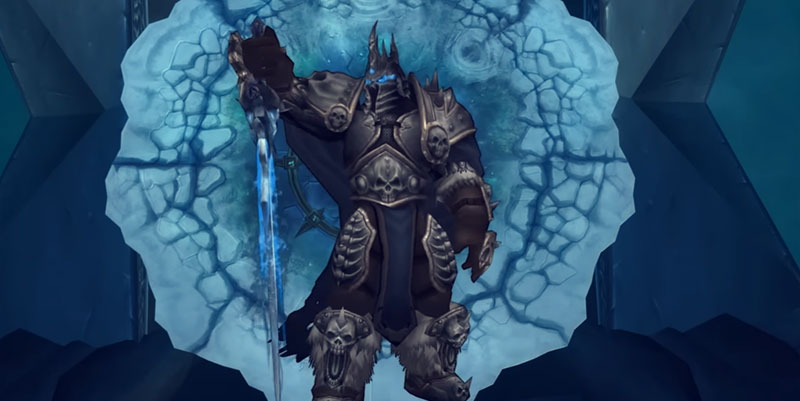
The Lich King is the final boss of Icecrown Citadel, with three phases and two intermissions. Here's a breakdown of the encounter:
- Phase 1: During Phase 1, deal with abilities like Infest, Vile Spirits, and Harvest Soul. Players must manage the Infest debuff and pass it to adds to avoid empowering Arthas.
- Transition to Phase 2: At 70% health, the encounter enters the first intermission. Players should move to the edges to avoid AOE damage in the center. Deal with Raging Spirits and dispel the final plague away from other players.
- Phase 2: Phase 2 introduces new abilities, including Defile, Soul Reaper, and Valkyrs. Properly position the group to manage Defile, and remember to swap tanks to handle the Valkyrs. The transition involves passing the Infest debuff to Valkyrs.
- Transition to Phase 3: At 40% health, the second intermission occurs. Players must pass through Ice Spheres and avoid the falling ice to reach the platform's center.
- Phase 3: Phase 3 is similar to Phase 1, but Arthas now summons Vile Spirits that must be soaked by the off-tank. Proper positioning is essential.
- Harvest Soul: Players affected by Harvest Soul are sent inside Frostmourne and must kill the warden or heal him to escape.
Heroic Mode:
On heroic mode, players face a unique Phase 3 that involves managing raid-wide damage and not refreshing their Shadow Prison stacks. The encounter's difficulty increases due to the new mechanics and increased damage output.
Conclusion:
Congratulations on your successful journey through Icecrown Citadel in Wrath of the Lich King. These guides provide a comprehensive overview of each boss fight and their respective mechanics. If you found these guides helpful, don't forget to like and subscribe. Stay tuned for more classic World of Warcraft content, and good luck in your future adventures!
Most Popular Posts
- WotLK Classic Phase 4 Updates: Top 10 Exciting New Stuff
- WotLK Classic Phase 4: Random Dungeon Finder Guide
- WotLK Classic Phase 4: DPS Tier List and Ranking
- WotLK Classic Icecrown Citadel Boss Guide: Tips and Tricks | Normal and Heroic Mode
- WotLK Classic Phase 4: How To Obtain The Best Gear Efficiently?
- WotLK Classic Phase 4 New RDF System: New Features and How to Use it?
Popular Category Lists
- Path of Exile / (873)
- Diablo IV / (702)
- Runescape / (344)
- New World / (172)
- WoW Classic SoD / (171)
- Guild Wars 2 / (159)
- Elder Scrolls Online / (138)
- FFXIV / (135)
- World of Warcraft / (65)
- WOW Classic / (43)
- Elden Ring / (40)
- Throne and Liberty / (36)
- SWTOR / (35)
- Albion / (35)
- Last Epoch / (32)
- League of Legends / (30)
- Dark and Darker / (28)
- Fallout 76 / (27)
- WotLK Classic / (23)
- Genshin Impact / (22)