0
0
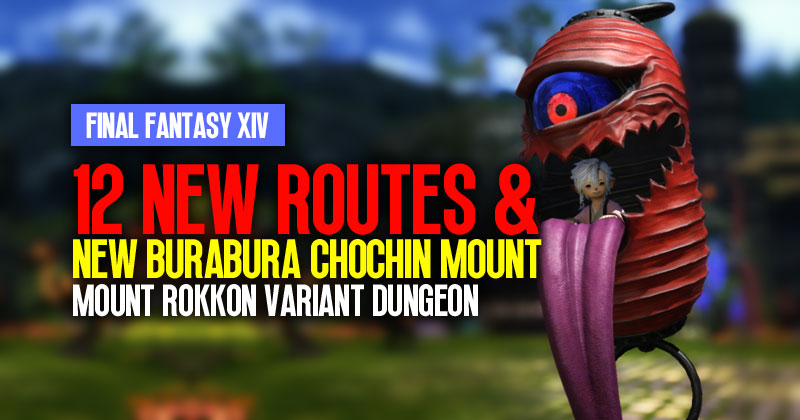
FFXIV Mount Rokkon Variant Dungeon: 12 New Routes & New Burabura Chochin Mount Guide
Greetings adventurers! Welcome to another comprehensive guide on the Mount Rokkon Variant Dungeon in Final Fantasy XIV. With Patch 6.45, 12 new exciting paths have been added to the new variant mode, Mount Urocon. In this guide, we will walk you through all twelve routes step-by-step, providing timestamps for easy navigation. Additionally, we will take a closer look at the magnificent mount, Burabura Chosen, as a reward for completing these paths. Let's delve into the dungeon and claim our well-deserved victory!
- All Routes
- Burabura Chosen Mount Preview
- How to Obtain the New Burabura Chochin Mount from Mount Rokkon?
↖ All Routes
| Path | Instructions | Final Objective |
|---|---|---|
| Path 1 | Left to Right, Touch Orb, Avoid Statues | For the first path, start by going left. When you encounter the Statue segment, immediately touch the orb and avoid touching any of the statues. Proceed through the dungeon, clearing mobs, and defeat the final boss to complete Path 1. |
| Path 2 | Left, Ignore Statues, Touch Orb | Similar to the previous path, choose the left path and ignore the statues again. Touch the orb, leave the sword case alone, and proceed to defeat the final boss to complete Path 2. |
| Path 3 | Left, Interact Phoenix x2, Dragon x1 | Once again, head left and interact with the Phoenix statue twice and the Dragon statue once. When you encounter the Water Sprite, let it cast Water 3, and focus on the other monsters first. Only defeat the Water Sprite after the other monsters are down. Defeat the final boss to complete Path 3. |
| Path 4 | Left, Interact Phoenix x2, Dragon x1 | Choose the left path and follow the same statute instructions as Path 3. However, this time, defeat the Water Sprite first to prevent it from casting Water 3. Proceed to defeat the final boss to complete Path 4. |
| Path 5 | Middle, Spare the Monkey | Take the middle path and proceed without killing the monkey. When given a dialogue option, choose to spare the monkey's life, and you will receive an extra treasure chest. Defeat the final boss to complete Path 5. |
| Path 6 | Middle, Kill the Monkey | On the middle path, this time, choose to kill the monkey by selecting the appropriate dialogue option. Defeat the final boss to complete Path 6. |
| Path 7 | Middle, Complete Jump Puzzle, Pull Rope | Follow the middle path and tackle the jump puzzle after the Tiger encounter. Pull the rope to open a new path, proceed through it, and defeat the final boss to complete Path 7. |
| Path 8 | Right, Ignore Dogu Statue, Polish Stones | Opt for the right path and ignore the Dogu statue. As you progress, you'll find stones of protection in white text. Click on each one to polish them. Defeat the final boss to complete Path 8. |
| Path 9 | Right, Ignore Dogu Statue, Do Nothing | On the right path, once again, ignore the Dogu statue and do not interact with the stones of protection. Defeat the final boss to complete Path 9. |
| Path 10 | Right, Grab Dogu Doll, Eastern Bow, Knock Rock | Choose the right path, grab the Dogu doll, and head to the Shrine. Perform the /e bow emote to open the Shrine, then place the doll inside. Choose to knock down the rock when given the option. Defeat the final boss to complete Path 10. |
| Path 11 | Right, Grab Dogu Doll, Eastern Bow, Knock Tree | Just like Path 10, but this time choose to knock down the tree at the Shrine. Defeat the final boss to complete Path 11. |
| Path 12 | Middle, Jump Puzzle, Activate Lanterns | On the middle path, complete the jump puzzle and pull the rope. Use the lanterns to activate a new boss encounter. Defeat the final boss in this area to complete Path 12. |
Claiming the Reward: After completing all 12 paths, leave the dungeon and claim the incredible mount, Burabura Chosen, from the achievement panel.
Notes: The final objectives for each path vary, with some paths leading to a different boss encounter or offering unique rewards based on the choices made during the journey.
↖ Burabura Chosen Mount Preview
Burabura Chosen is a lantern-like mount that your character rides within. It has beautiful luminosity and emits a nostalgic, Yokai-themed vibe. The mount is available in terrestrial and flying formats, with unique animations for both. Additionally, it comes with special mount music featuring a mesmerizing piano version of the Kugane theme. Enjoy the sight and sound of this extraordinary mount as you travel across Eorzea!
↖ How to Obtain the New Burabura Chochin Mount from Mount Rokkon?
If you're eager to get your hands on the brand new Burabura Chochin Mount from Mount Rokkon in FFXIV, follow these steps to achieve it in the latest variant dungeon.
- Step 1- Enter the Dungeon: Upon entry, you will see four portals. Portals 1 and 2 are on the left path, portals 5, 6, 7, and 12 are on the middle route, and portals 8 to 11 are on the right route.
- Step 2- Portals 1 and 2: Head through the left side portal and defeat the waves of enemies. Continue until you reach the first boss. After defeating the boss, make your way upstairs to the room with the Suzaku and Seriu statues. For portals 1 and 2, ignore both statues and open the door. Clear the room and defeat any remaining enemies.
- Step 3- Portals 1 and 2 Continued: You'll have access to the Katana case. For portal 1, close the case and defeat the final boss. For portal 2, leave the case open and defeat the final boss.
- Step 4 - Portals 3 and 4: Repeat the process for portals 1 and 2. Return to the Statue room and turn Suzaku to face south and Cereu to face east. This will unlock a hidden room. Defeat the enemies in the hidden room to unlock the final boss.
- Step 5 - Portals 5 and 6: Start a fresh run and take the middle portal. Reach the first boss room and pull the woven rope outside. Defeat the boss and follow the right path, defeating the Biako painting. Continue until you find the Shizu White Baboon. For portal 5, choose option one, and for portal 6, choose option two.
- Step 6 - Portals 7 and 12: For the fourth hidden boss, choose the middle route again and proceed to the first boss encounter. This time, leave the woven rope and proceed inside. After defeating the first boss, follow the left path and climb the wall on the left side. Pull the woven rope to unlock the door behind. This will lead you to the room with three Chochin lanterns for Portal 7. Kill all three lanterns and then defeat the final boss. For Portal 12, bring the lanterns back to the previous room and kill each of them one by one in front of the lanterns with the golden banners. Once all three are lit, you can proceed to the secret boss room.
- Step 7 - Portals 8 and 9: Take the right path once again. Reach the tree with the clay doll and leave it there for portals 8 and 9. Defeat the first boss and follow the left path. You'll find four stones of protection. For Portal 8, leave the stones be and kill the final boss. For portal 9, return on a fresh run and wipe the moss away from all four stones and kill the final boss.
- Step 8 - Portals 10 and 11: Take the right path and return to the tree with the clay doll. This time, take the doll with you. After beating the first boss, follow the right path until you find the Shrine-type Ebaos for the Eastern Bower mode. Put the clay doll inside the Shrine to unlock portal 10. Cross the tree and continue onwards until you find an ancient tree and an Iwakura stone. Push the tree over to unlock portal 11.
- Step 9 - Complete Your Achievement: In a fresh run, choose the stone that unlocks Portal 11 and complete the dungeon. Congratulations! You've obtained the brand-new Burabura Chochin Mount from Mount Rokkon in FFXIV.
Conclusion:
Congratulations on conquering all 12 paths of the Mount Rokkon Variant Dungeon and obtaining the remarkable Burabura Chosen mount! This guide has been helpful in your adventure. If you have any further questions or need boss-specific guides, don't hesitate to ask. Happy hunting and safe travels in Eorzea!
Most Popular Posts
- FFXIV Endwalker Patch 6.4 Tier List: Meta Placement & Job Rankings
- FFXIV Patch 6.4 Island Sanctuary Rank 16 Rewards: Glamour, Mounts, and New Buildings
- FFXIV Patch 6.4 Update: Level 90 Gear Progression Guide
- Top 10 Epic Samurai Weapons: How to obtain them in FFXIV?
- FFXIV Containment Bay Z1T9: Zurvan (Unreal) Fight Guide
- FFXIV Patch 6.51 New Exquisite Tomestone Weapons Guide
Popular Category Lists
- Path of Exile / (873)
- Diablo IV / (702)
- Runescape / (344)
- New World / (172)
- WoW Classic SoD / (171)
- Guild Wars 2 / (159)
- Elder Scrolls Online / (138)
- FFXIV / (135)
- World of Warcraft / (65)
- WOW Classic / (43)
- Elden Ring / (40)
- Throne and Liberty / (36)
- SWTOR / (35)
- Albion / (35)
- Last Epoch / (32)
- League of Legends / (30)
- Dark and Darker / (28)
- Fallout 76 / (27)
- WotLK Classic / (23)
- Genshin Impact / (22)