0
0
Guild Wars 2: Top 4 Best Maps To Farm Gold in 2023
- Gertie
- Share
- Guild Wars 2
- 05/15/23
- 20058
Gold farming is a popular and lucrative activity in Guild Wars 2, allowing players to earn substantial amounts of gold while enjoying various gameplay activities. This comprehensive guide will walk you through the best maps for gold farming, highlighting their unique features, and differences, and providing tips to optimize your loot and maximize profits in each location.
- General Farming Tips
- Unidentified Gear Salvaging Guide
- What Should You Do with Your Valuable Loot?
- Drizzlewood Coast
- Drizzlewood Coast Loot Optimization
- Dragonfall
- Dragonfall Loot Optimization
- LS4 Trains
- LS4 Trains Loot Optimization
- Silverwastes (F2P Friendly)
- Silverwastes Loot Optimization
- Other Notable Farms

Important Note: The gold values discussed in this guide encompass the "total gold value", which includes wallet gold, items, and currencies. Focusing solely on raw or wallet gold would result in missing out on significant profits from these methods.
↖ General Farming Tips
Farming can be a fun and lucrative activity in Guild Wars 2, but it's important to approach it in the right way. Here are some tips that apply to all types of farms:
- Enjoy the content you're farming - don't farm something just because it's profitable. You'll burn out and make less gold in the long run. Find farms that you enjoy and switch things up if you get bored. This guide provides some good starting points.
- Use an appropriate build - for open world farms, you want a weapon with skills that can quickly tag multiple targets. Examples include a longbow for the ranger, a greatsword for mesmer, or shortbow for the thief. Some players also prefer defensive gear to survive and tag more efficiently.
- Use boosters and consumables - maximize your loot by using guild boosts, enrichment in your ascended amulet, food enhancements, and more. Focus on experience boosters. Magic finds boosters, and then karma and gold boosters. Check out a more comprehensive list of boosters in the description.
↖ Unidentified Gear Salvaging Guide
When it comes to Guild Wars 2 gold farming, it's crucial to maximize your loot yield by processing it effectively. To ensure you make the most of your time, it's important to follow the correct procedures for salvaging unidentified gear. Before salvaging, always open the gear to identify its contents. If you need help determining which salvage kits to use for different types of gear, refer to the intuitive system outlined below. This system is also conveniently accessible in the description section once you've completed salvaging your gear.
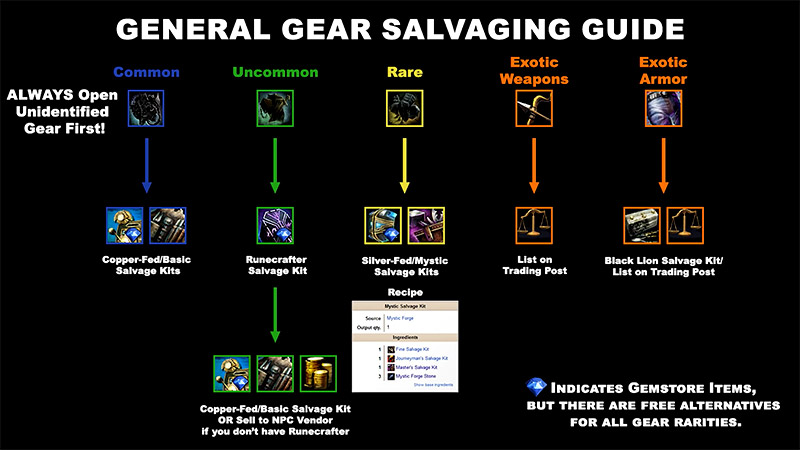
By adhering to this optimized salvaging approach, you can enhance the benefits derived from your unidentified gear and make the most efficient use of your farming efforts.
↖ What Should You Do with Your Valuable Loot?
- Refine raw materials at a crafting station: By refining raw materials, you can significantly increase their value. Hold on to materials that you anticipate needing in the future to avoid spending gold on repurchasing them.
- Sell strategically on the trading post: When selling your items, place them on the right side of the trading post and list them rather than instantly selling. Instant selling might make players like me richer, but it's better for you to keep everything you've earned. Common materials generally sell quickly when listed, and in the long run, you'll make more gold than you would by instant selling.
- Understand the value of currencies: Certain currencies, such as spirit shards, can be used in crafting recipes and material promotions at the mystic forge. This can either earn you gold from selling the result or save you gold. When acquiring materials for your own needs, unbound magic can be used to purchase magic-warped bundles and volatile magic can be used to buy trophy or leather shipments. You can find links to public calculators for these currencies in the description.
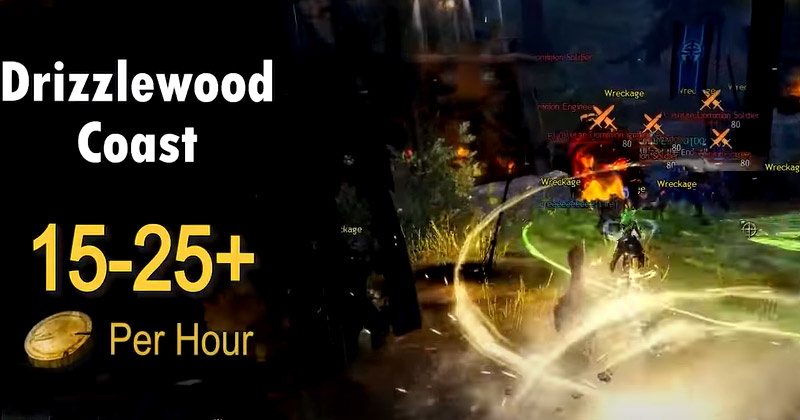
↖ Drizzlewood Coast
To effectively farm Drizzlewood Coast, the following requirements need to be met: unlock the corresponding chapters of the Icebrood Saga, namely "No Quarter" and "Jormag Rising".This farm offers several advantages over others. Firstly, it is not timer-based, allowing you to join at any time. Additionally, the first half of the map is largely self-directed, eliminating the need for a specific starting time or reliance on a commander. Many players appreciate the unique nature of the first half, which can be fully repeated. Furthermore, this farm provides a wide variety of items, including tier 2, 3, and 4 materials like bull scraps, steel, ingots, and sharp claws, which are not commonly dropped in another level 80 maps.
Drizzlewood Coast stands out as the best map for farming materials required to craft ascended gear. It is also a reliable source for gathering materials necessary for crafting certain pieces of legendary gear, such as Gifts of Condensed Might and Magic. Lastly, the overall value of loot obtained from this map is highly competitive with other top farms, making it an attractive choice for farming enthusiasts.
So, how does this farm work on a fresh map? Start by completing events and escorts that gradually lead to the capture of more territory. You can utilize the map currency, War Supplies, to airdrop areas with active events. This initial phase is self-directed, so there is no need to follow a commander. Engage in as many events around the map as possible. Once you have captured all the areas on the south side of the map, a meta-boss fight will commence at Wolf's Crossing. Defeating these bosses rewards you with chests and initiates the most profitable part of the farm, a chain of Champion Cache Keepers.
Look for an orange boss icon on the map, indicating the location of the Cache Keeper. Quickly airdrop as close as possible and make your way to it. These Cache Keepers can be defeated swiftly, and having a Griffin or Skyscale mount greatly aids in reaching them promptly. While not necessary, these mounts help ensure that you receive credit for all the Cache Keepers. After defeating a Cache Keeper, you'll obtain a few cash chests, followed by the spawn of another Cache Keeper. Repeat this process until you have defeated all 10 Cache Keepers on the map or until time runs out. After a short delay, the north side of the map will become active.
The north side of the map follows a more typical structure, resembling a meadow with a series of sequential events. At this point, you will usually find a commander to follow. Upon reaching the Citadel at the end of the map, a chain of events with a boss fight and additional chests will occur, marking the completion of the map. While the north side yields slightly lower profits compared to the south side, it is still quite decent.
↖ Drizzlewood Coast Loot Optimization
If you're looking to optimize your loot in Drizzlewood Coast, there are several strategies you can employ. Apart from the traditional methods of obtaining loot through killing mobs, completing events, and looting, there are additional avenues you can explore.
One of the primary sources of loot in Drizzlewood Coast is the chests that spawn every 10 minutes. The number and quality of these chests depend on the progress of the meta event on the south side. As the meta progresses, you'll automatically receive chests at regular intervals. Keep an eye on the meta's advancement to gauge the frequency and value of the chests.
Collecting char commendations and progressing through the Glory to the Legion achievements is another way to earn rewards. Similar to reward tracks in PvP or World vs. World, these achievements offer additional loot opportunities. Once you've completed all the Glory to the Legion achievements, it is advisable to speak with an NPC located near the base camp waypoint. This NPC allows you to allocate your commendations to the most profitable legion. Check the provided link in the description for a page on the Fast Farming website, which displays the profitability of each legion. Keep in mind that these values may change over time, so it's wise to stay updated.
While interacting with the NPC mentioned earlier, you also have the option to purchase a small magic find boost and additional cache keys. These keys are essential for unlocking chests during the meta event. The price of these items increases with each purchase and resets daily. To ensure you have an ample supply, it is recommended to buy them regularly.
In summary, to optimize your loot in Drizzlewood Coast, focus on killing mobs, completing events, and looting as usual. Additionally, keep track of the meta event's progress to obtain chests at regular intervals. Collect char commendations and progress through the "Glory to the Legion" achievements, allocating your commendations to the most profitable legion. Finally, consider purchasing magic find boosts and cache keys from the NPC near the base camp waypoint to enhance your loot-gathering capabilities.
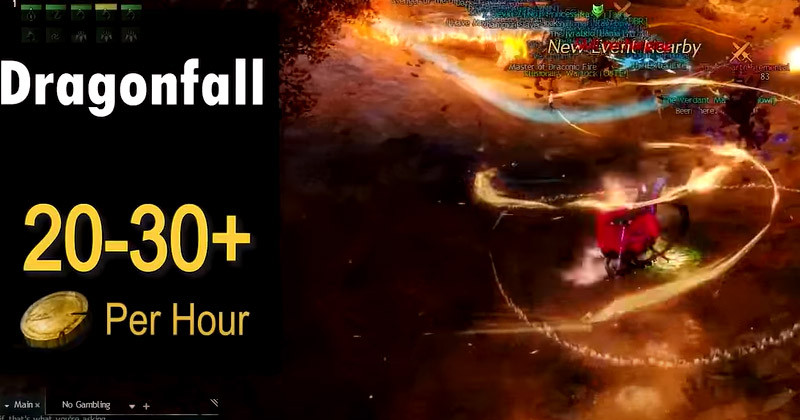
↖ Dragonfall
Dragonfall is a highly sought-after farming location in Guild Wars 2. To effectively farm Dragonfall, you'll need the corresponding Living World Season 4 episode unlocked or Eternal. Additionally, having the Thermal Propulsion mastery from Living World Season 3 and the fully upgraded Gliding mastery track from Heart of Thorns will greatly enhance your navigation on the map if you don't have a Skyscale mount. Let's delve into the key aspects of farming Dragonfall:
Advantages of Dragonfall:
- Unique and visually appealing: Dragonfall boasts a visually stunning and distinct map, which many players find enjoyable and refreshing compared to other farming areas.
- Consistent loot variety: Dragonfall provides a diverse range of loot, ensuring that your farming efforts remain rewarding even when certain items experience price fluctuations.
- Repeatable and not on a timer: Unlike some other farming locations, Dragonfall can be farmed repeatedly without being restricted by time limitations.
- Competitive gold per hour rate: When farmed efficiently, Dragonfall offers an excellent gold per hour rate, making it a financially rewarding endeavour.
Disadvantage of Dragonfall:
- Map instances and commander efficiency: To maximize your gold per hour, you'll need to join a map instance led by a skilled commander. The effectiveness of the commander and the coordination within the group will significantly impact your farming efficiency.
Farming Process on a Fresh Map:
- Escort missions: Start by participating in escort missions to establish three camps located in different areas of the map. These camps will serve as hubs for future activities.
- Event completion and camp leveling: Engage in various events within these areas to level up the camps. Along the way, you'll earn loot rewards, enhancing your farming experience.
- Boss fight: Once the camps are leveled up, proceed to a challenging boss fight. Defeating the boss will yield a plethora of chests containing valuable rewards.
- Champion train: After the boss fights, join a champion train. This train will involve taking down powerful champion enemies, providing even more loot and valuable items.
↖ Dragonfall Loot Optimization
To optimize your loot when opening chests at the end of the Dragonfall meta event, it is crucial to acquire Mistborn Keys. Unlike the keys found in Drizzlewood Coast, the number of keys you receive in Dragonfall is limited. Therefore, it is important to participate in as many events as possible at the beginning of the meta in order to maximize your key count for looting. Additionally, each chest at the end of the meta event provides an opportunity to purchase account upgrades known as Empowerments and Retributions from an NPC at the Packed Camp.
Empowerments and Retributions are permanent upgrades that increase the experience and karma you gain while farming in Dragonfall. If you plan on spending a significant amount of time in Dragonfall, these upgrades can be a worthwhile investment. As you farm in Dragonfall, you will also accumulate Volatile Magic, a valuable currency. You can trade Volatile Magic for trophy and leather shipments, which further enhances your profits.
↖ LS4 Trains
A farm that covers all five maps of Living World Season 4 except Dragonfall. While completing the entire train requires the first five episodes of the Living World Season 4 story, you can still participate even if you're missing some episodes. One of the unique advantages of this farm is its variety, as you'll be hitting five different maps, each with its own appearance and events to complete. Additionally, this farm has one of the highest yields of experience and karma for an open world farm, making it a great choice for players looking to make gold through legendary crafting once they have all the necessary account augmentations.

However, there are some downsides to this farm. First, you'll need to own multiple episodes of Living World Season 4 to participate, which requires a significant investment. Additionally, maximizing the output of the farm requires account augmentations and a commander to start running, which can only be done at set times. While the farm is repeatable, you'll need to do it on a second character to get most of the loot the second time around. One run can take over three hours, so doing it twice may not be feasible for most players.
To participate in this farm, you'll mostly be completing the meta events in Domain of Istan, Sandswept Isles, Domain of Kourna, Jahai Bluffs, and Thunderhead Peaks. In between meta events, you'll complete bounties and other events to get additional loot. The route the train takes can vary slightly based on the commander's preferences and what's available on the map at the time. The commander will provide directions throughout, so you don't need to know the specifics.
To join an LS4 Train, you can find one in the Chul Choo Alerts channel in the Overflow Trading Company Discord. Check the description for a link to the server. Overall, LS4 Trains is a great farm for players looking for variety and high yields of experience and karma, but it does require significant investment and a commander to start running.
↖ LS4 Trains Loot Optimization
To optimize your loot in LS4 trains, there are several key methods to consider. Your loot will primarily come from tagging mobs, completing events, and looting chests. Unlike previous farms, there are no keys to worry about, giving you an advantage. Account augmentations play a significant role in this farm, so it's important to unlock the three tiers of empowerment and retribution on the various maps. Although it requires a decent amount of gold and volatile magic, this investment will permanently increase the amount of experience and karma you receive, much like Dragonfall.
One of the main sources of value in this farm is the volatile magic you earn, as mentioned earlier. You can convert volatile magic into gold through trophies and leather shipments. Many farmers use the Carmen spirit shards obtained from this farm to craft legendaries for profit. To reduce costs, they often purchase trophy shipments and perform tier 6 material promotions in the Mystic Forge to obtain their gifts of might and magic conveniently.
↖ Silverwastes (F2P Friendly)
Silverwastes is a farming area that is accessible to free-to-play players and offers consistent rewards. Different from other farms discussed earlier, Silverwastes does not require any specific episodes of the Living World story to participate in, making it a great option for those without access to expansions or specific episodes. One of the biggest advantages of this farm is its accessibility, as there is almost always an instance of the map running.
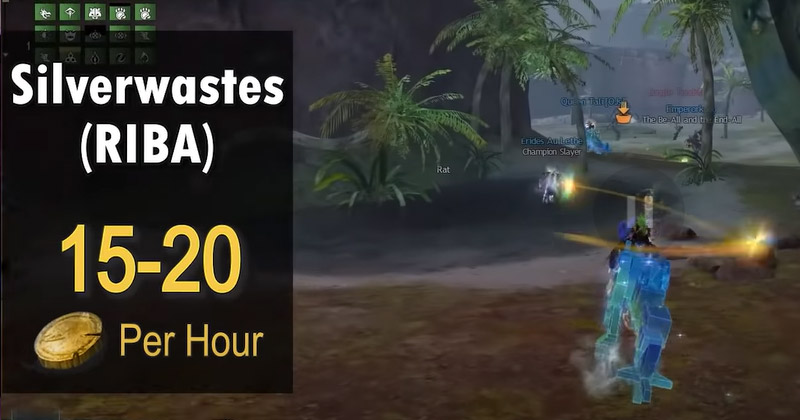
However, it's important to note that the gold per hour in Silverwastes is lower compared to some other farms mentioned in this guide. Additionally, the farm can become repetitive, which may deter some players from engaging in it for extended periods.
Let's dive into how Silverwastes works. For the majority of the farm, you'll be following a counter-clockwise rotation and completing events around the Red, Indigo, Blue, and Amber forts. This farming method is often referred to as "Reba."
During this rotation, there is a chance for four different legendary bosses to spawn. Each time you defeat one of these bosses, you'll receive a Central Tyria Mastery Point, so keep an eye out for them if you need those points. As the map progresses, bosses will spawn at each fort and must be defeated. Once all the fort bosses are defeated, the Vine Wrath boss will spawn on the west side of the map.
To defeat the Vine Wrath boss successfully, players will need to split into three groups and take turns killing mini-bosses. This coordinated effort will complete the meta event, and the map will progress to the chest train phase.
In the chest train phase, you can utilize Silverwaste Shovels to locate Lost Bandit Chests scattered throughout the area. Once you find these chests, you can open them using Bandit Skeleton Keys. This part of the farm provides additional rewards for your efforts.
Remember, participating in the Silverwastes farm is a great way to earn rewards without the need for expansions or specific Living World episodes. While the gold per hour may be lower compared to other farms, the accessibility and consistency make it a viable option for free-to-play players.
↖ Silverwastes Loot Optimization
To maximize the loot you obtain in the Silverwastes, there are several steps you can follow. Once you have completed the chest train section, you can repeat the process to optimize your loot. One significant aspect that can greatly improve your loot output is opening the bags you receive on a lower level character. This strategy allows you to obtain lower level gear and materials that are actually more valuable.
After acquiring the bags, the best character to open them with is typically around level 55, although this may vary slightly depending on the specific bag. While it is not necessary to use a specific character for bag opening, doing so can be beneficial, especially if you engage in frequent Silverwastes farming. For further assistance in determining the optimal level to open your bags, you can refer to the link included in the description. This link provides information about the value of the bags when opened at different levels.
↖ Other Notable Farms
In addition to the previously mentioned farms, there are several other farms that may suit your needs in specific situations. While they may provide less total gold value, they offer alternative options worth exploring. Here are some of them:
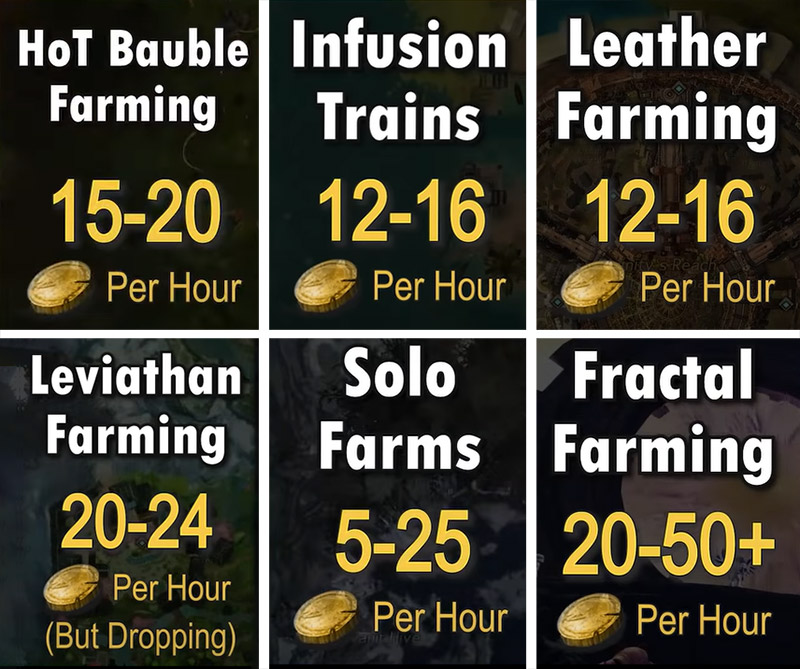
- Thorn's Bobble Farms: Thorn's Bobble Farms can yield a decent amount of raw gold per hour. However, they rely on weekly map reward rotations and may offer a lower gold value than other farms. Keep in mind that the profitability of these farms can vary.
- Arik Basin Bobble Farm Infusion Trains: The Arik Basin Bobble Farm Infusion Trains are particularly lucrative due to their rare infusion drops, which can be worth thousands of gold. Although the average profit from these trains is generally low, they run periodically in the Overflow Trading Company. Join their Discord for more information (link in the description).
- Lake Doric Leather Farms: If you require leather materials, the Lake Doric Leather Farms can provide a substantial amount. However, these farms are relatively uncommon and offer a lower gold per hour rate compared to other options.
- Leviathan Farming: With the introduction of the End of Dragons expansion, Leviathan Farming has emerged as a new farming method. Initially, it boasted impressive gold per hour rates, but the profitability has since declined and aligned with other popular farms. Keep in mind that the profit potential of this farm may decrease further in the future.
- Solo Farms: Additionally, there are various solo, chest, and node farms with different gold per-hour rates. You can find guides for these farms on websites such as Fast Farming and Pew Research Center. If you are interested in solo farming, you can find links to those sites in the description.
Conclusion:
These gold farms provide some of the best options currently available in Guild Wars 2. Remember, it's crucial to prioritize enjoyment rather than treating it like work.
Most Popular Posts
- Guild Wars 2 Open World PvE Builds: Ranking & Tier List For 2023
- Guild Wars 2: Top 4 Best Maps To Farm Gold in 2023
- Guild Wars 2 Wizard's Vault Items: Tier List For Best and Worst
- How to get more gold with unidentified gear in Guild Wars 2, 2023?
- How to Get Research Notes Quickly and Efficiently in Guild Wars 2, 2023?
- How to Farm Gold Weekly with Imperial Favors | Guild Wars 2?
Popular Category Lists
- Path of Exile / (873)
- Diablo IV / (702)
- Runescape / (344)
- New World / (172)
- WoW Classic SoD / (171)
- Guild Wars 2 / (159)
- Elder Scrolls Online / (138)
- FFXIV / (135)
- World of Warcraft / (65)
- WOW Classic / (43)
- Elden Ring / (40)
- Throne and Liberty / (36)
- SWTOR / (35)
- Albion / (35)
- Last Epoch / (32)
- League of Legends / (30)
- Dark and Darker / (28)
- Fallout 76 / (27)
- WotLK Classic / (23)
- Genshin Impact / (22)