ESO Builds: Powerful & Easy Dragonknight PVP Duel Budget Guide | 2023
- Eliza
- Share
- Elder Scrolls Online
- 05/03/23
- 3063
Welcome to the world of PvP dueling in Elder Scrolls Online! If you're new to dueling and want to test your skills against other players, then this Dragonknight PvP Dueling Build is a great place to start. However, before we dive into the build, there are a few things you should know about the duellng community. High-tier dueling can be a toxic environment, and you're likely to encounter players who will make excuses and deflect blame when they lose. So, it's important to approach dueling with a light-hearted attitude and not take anything too seriously. The goal is to have fun, test out different builds, and improve your skills over time.
↖ Race & Mundus & Food
Let's dive into the build format for this guide. Here is our character sheet with the front bar and back bar setup. Our resistances are as follows: 55 points into maximum Magicka, around 30k max Magicka on the front bar, and 28k health on the front bar.
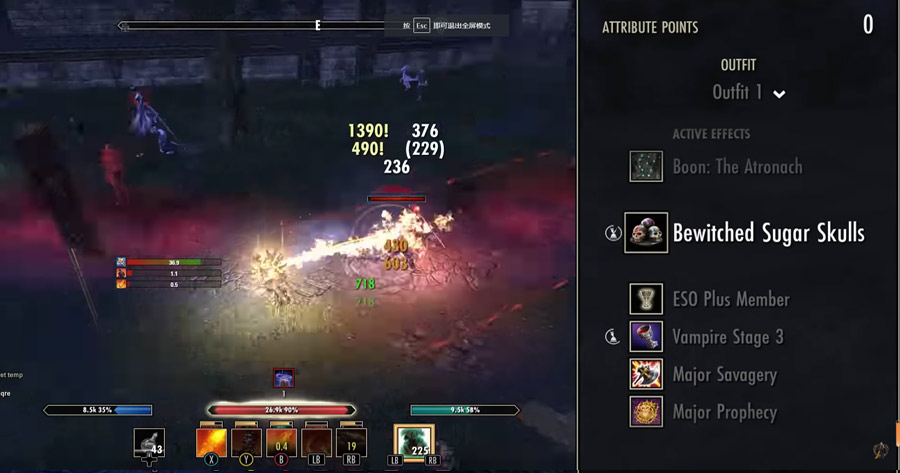
For our race, we've chosen Breton as it offers well-stacked passives that make it the best all-around race. However, you can also choose Dark Elf or Imperial. The class doesn't matter much for a Dragonknight build, as everything performs well.
Regarding the Mundus Stone, we're running the Atro, but you can also opt for the Warrior or the Lover to boost your damage output. Additionally, we're using the Undeath passive and are at vampire stage 3. This is necessary for dueling.
When it comes to food, we recommend Lorraine with Sugar Skulls. However, if you find yourself having sustained issues, you can replace them with Jules and Visceral or Smoke Bear Haunches.
↖ Gear & Gameplay
Let's take a look at the gear and gameplay of this build. On our front bar, we have the Master's Perfecta Dual set, using two Maces with a Sharpen and Charge enchantment. Additionally, we have a Flame and Poison enchantment on the maces. The Flame enchantment helps maintain the Burning status effect on the opponent, which restores 1000 Magicka every time the effect is applied, thanks to our Combustion passive.

The Perfecta version of the set provides a Line of Critical damage, and the two-piece set bonus significantly boosts the damage provided by Bloodthirst, which we will discuss shortly. On the back bar, we have the Vateshran Ice Staff, with a Defending trait and a Berserker damage Glyph. The two-piece bonus of the set tethers the opponent with Flame, Ice, or Frost damage every time you cast Weakness to Elements. The set not only provides excellent damage over time but also synergizes well with another set that we'll cover in a moment.
Moving on to armour, we have Triglyphs on every piece. We're using Zon's as the first set, which is the most powerful set when it comes to monster battles. We're using the Impenetrable trait for this set to protect against NightBlades' critical damage. The two-piece bonus of the set provides a Line of Critical damage, and the critical damage of a Light or Heavy attack tethers the opponent for 10 seconds, dealing Flame damage every second. Each tick of Flame damage also applies the Burning status effect, and every time the effect is applied, we restore 1000 Magicka. This set creates immense pressure on the opponent and synergizes well with the class and another set we're running.
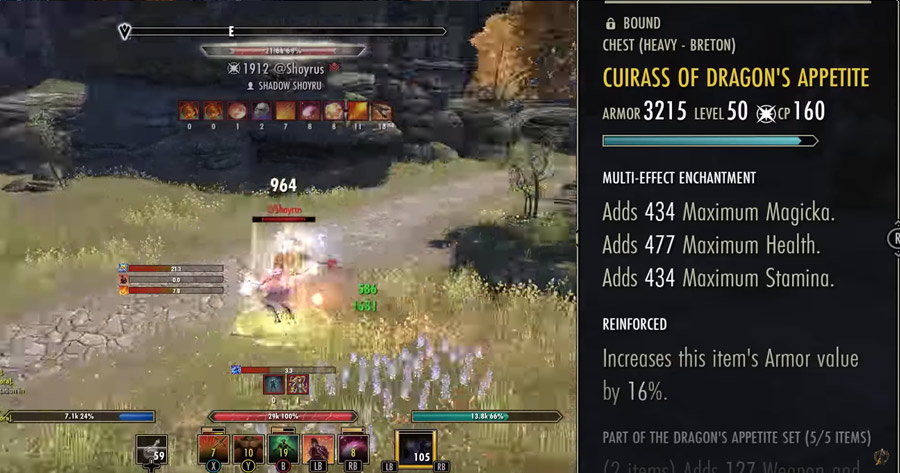
We're also using Dragon's Appetite, which is the cornerstone of the build. The set gives Weapons Full Damage on the two-piece and provides Lines of Stamina Recovery on the three and four-piece. The five-piece bonus increases the damage done to bleeding enemies by 222, and doing non-bleed damage to bleeding enemies generates a persistent stack of Dragon's Appetite, up to once per half-second. After accumulating 10 stacks, you consume Dragon's Appetite and heal for 11,270 health. The healing effect scales off the higher your maximum Magicka or Stamina. To activate this set, you need to have a bleeding effect on the target. That's why we're using Bloodthirst from the Dual Wield skill, along with any non-bleed damage. This set provides both immense healing and damage, making it the best offence and defence set.
We're also using a Two-Piece Training set and a Light Sash. The Training set provides some stats and maximum health and Magicka. We have one Well-Fitted Dragon's Embracers, with one Light, five Medium, and one Heavy armour piece. Moving on to the Mythic item, we're using the Sea Siren's Song. This set provides a 40% damage reduction when taking damage while at full health, making it an excellent defensive choice. We have infused the set with Cost Reduction to maintain our sustainability. We rely on our Battle Roar passive to restore our resources and apply the Burning status effect.
↖ Skill Bars & Potions
To optimize your build, we recommend setting up your skill bars and potions as follows:

On your first skill bar, slot Infused, Wave, and Support Damage enchantments, and use Bloodthirsty Weapons enchantment on your last ring. Start with Engulfing Flames, which deals powerful AoE damage over time and boosts all of your flame damage by 6%, including the burning status effect and zone effects like Shattering Rocks. We recommend using this morph for its decent kill potential and critical hit chance.
Next, slot Flames of Oblivion as your spammable ability and generate Rending Slashes. While this skill is slotted, you gain Major Prophecy, which increases your critical strike chance by 10. Molten Whip is your pseudo execute and the main source of burst damage. When you activate an ability like Engulfing Flames, you gain a stack of Seething Fury, which can be consumed to increase the damage of your Molten Whip by 20 per stack consumed. When you consume three stacks, you also gain an additional 300 weapon damage for 15 seconds.
Blood Craze is a vital skill for applying bleed damage to your opponent and generating Dragon's Appetite stacks, which heal you. With this skill, the build will work. Ferocious Leap acts as your crowd control and gap closer and also deals significant damage while providing a sturdy shield.
On your second skill bar, slot Burning Embers to apply serious damage over time effect that heals you for 102% of the damage done every time it ticks. Coagulating Blood should be used sparingly as an emergency healer, as it can deplete your resources quickly. Resolving Vigor is one of the best healing over time effects and also provides Minor Resolve, which increases your physical and spell resistance by approximately 3,000.
Volatile Armor is your source of Major Resolve and also deals flame damage over time to enemies around you. Use Elemental Susceptibility to apply all three status effects (burning, concussed, and chilled) every 7.5 seconds, which is also used to proc Baseline and provides Major Breach. Finally, use Temporal Guard for Minor Protection and a small damage shield whenever you block.
For potions, we recommend using Keen Observable Notice for restoring stamina, providing Major Endurance and Major Brutality, and increasing your critical hit chance. Use Battle Drop Potions instead of Alliance Spell Drop Potions since you have access to Minor Brutality on your build.
↖ Champion Points
If you're looking to maximize your damage output while using alliance abilities, spells, and potions, consider allocating some of your champion points to the blue tree. One recommended skill to invest in is Cleansing Revival, which currently has a bug that removes all harmful effects from a target under 25 health. This effect can occur every 24 seconds and doesn't require the target to be below 25% health.
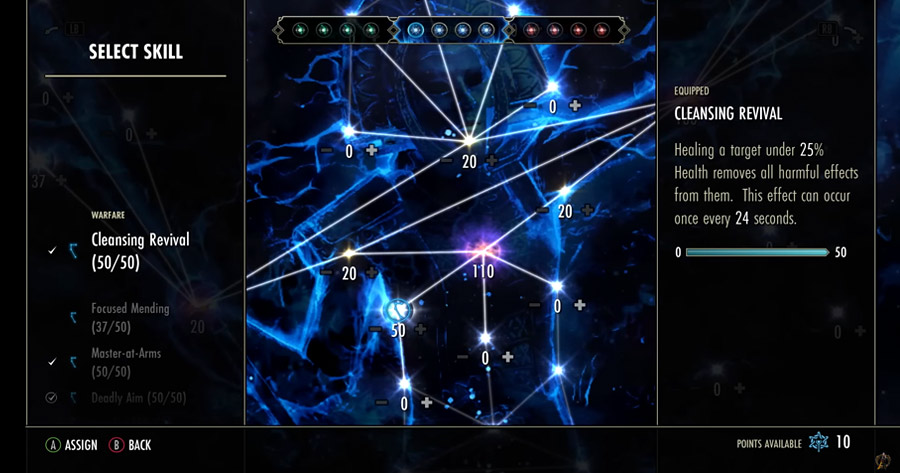
In addition, investing in Master-at-Arms will increase your damage done with weapon attacks by 6%, while Deadly Aim increases your damage done with single-target effects by the same amount. Moving over to the red tree, Relentlessness, Piercing, and Fortress are useful skills to consider. Relentlessness increases your resource recovery while Piercing boosts your armour penetration. Fortress provides additional damage mitigation.
Finally, for the green tree, investing in skills like Gifted Rider, Steed's Blessing, and Liquid Efficiency can improve your overall efficiency in combat.
Conclusion:
This Dragonknight PvP dueling build guide provides a comprehensive overview of eso items, gear, gameplay, and skill bars necessary to excel in the dueling community. Overall, the guide offers valuable insights and advice for anyone looking to test their PvP dueling skills in Elder Scrolls Online. Thanks for reading this guide, and good luck with your champion point allocation!
Most Popular Posts
- ESO Bastion Nymic Guide: How to Conquer New World Event in Necrom Chapter?
- How do players choose the best PVP set after The Elder Scrolls Online latest patch?
- Which are the Best Elder Scrolls Online Solo Class in 2023?
- ESO Necrom Chapter Launch: How to start this epic adventure?
- ESO Endless Dungeon: Everything You Need to Know
- ESO (2023) Guide: Most Efficient Way To Farm Gold For Beginners
Popular Category Lists
- Path of Exile / (873)
- Diablo IV / (702)
- Runescape / (344)
- New World / (172)
- WoW Classic SoD / (171)
- Guild Wars 2 / (159)
- Elder Scrolls Online / (138)
- FFXIV / (135)
- World of Warcraft / (65)
- WOW Classic / (43)
- Elden Ring / (40)
- Throne and Liberty / (36)
- SWTOR / (35)
- Albion / (35)
- Last Epoch / (32)
- League of Legends / (30)
- Dark and Darker / (28)
- Fallout 76 / (27)
- WotLK Classic / (23)
- Genshin Impact / (22)


 0
0


